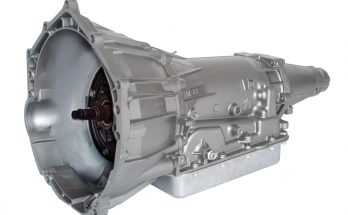
Your vehicle’s transmission cooler plays a crucial role in keeping the transmission fluid at optimal temperatures. Over time, it can accumulate debris and contaminants, leading to decreased performance and potential damage. Flushing the transmission cooler is an essential maintenance task that helps prolong the life of your transmission and ensures smooth operation. In this blog post, we’ll guide you through the process of flushing a transmission cooler, along with a helpful YouTube video that visually demonstrates the procedure.
Tools and Supplies
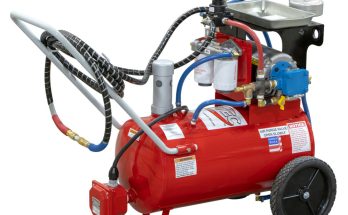
Before starting the transmission cooler flushing process, gather the following items: a drain pan, safety goggles, gloves, a socket set, a open ended wrenches (flare or line wrenches preferred to prevent rounding fittings), fresh transmission fluid, and a transmission cooler flushing kit.
The flushing kit usually contains hoses, connectors, and a pump to facilitate the flushing procedure. Once you have everything ready, park your vehicle on a level surface and engage the parking brake.
Locate the Transmission Cooler & Lines
The transmission cooler location is typically in the radiator in the front of your vehicle. Refer to your vehicle’s manual or search online for the exact location. It is essential to identify the cooler to ensure a successful flushing process. Once located, prepare the drain pan beneath the cooler and lines to catch any fluid that may spill during the procedure. A common issue you might have is that there isn’t a ton of space to access the cooler lines.
Disconnect the Lines and Attach the Flushing Kit
Begin by carefully disconnecting the transmission lines from the cooler. Depending on your vehicle, you may need a socket set or wrench to loosen the fittings.
To prevent rounding off the existing fittings, consider using a line wrench. These are specifically designed to remove line fittings such as what you have on transmission cooler lines.
Once detached, connect the flushing kit hoses to the transmission lines. Ensure a secure connection to prevent any leaks during the flushing process. Double-check that the hoses are correctly attached before proceeding.
Flush the Transmission Cooler
![]()
With the flushing kit properly connected, it’s time to initiate the flushing process. Start the engine and let it idle. This will enable the transmission fluid to flow through the flushing kit and cycle back into the transmission. Refer to the instructions provided with your flushing kit for the recommended duration of the flushing process. As the fluid flows through the kit, contaminants and debris will be expelled into the drain pan. Keep a close eye on the fluid color to ensure it becomes clear, indicating that the cooler is thoroughly flushed.
Reconnect the Lines and Refill with Fresh Fluid
Once the transmission cooler is sufficiently flushed, turn off the engine and disconnect the flushing kit from the transmission lines. Reconnect the lines to the cooler, ensuring they are tightly secured. Proceed to fill the transmission with fresh transmission fluid, following your vehicle’s specifications.
Use a flare wrench to tighten the transmission pan bolts to the recommended torque value. Finally, start the engine and allow it to idle for a few minutes to ensure proper circulation of the new fluid.
Flushing your transmission cooler is an important maintenance task that helps optimize the performance and longevity of your vehicle’s transmission. Regularly performing this procedure can prevent costly repairs and ensure smooth shifting. Watch the YouTube video below for a visual guide to flushing your transmission cooler.
After 15+ years in the automotive industry, I’ve developed strong opinions about transmission cooling — and about the lack of reliable information available to enthusiasts who actually need it.
I’ve built and developed transmission cooler systems across a wide range of applications: street cars, race cars, and trucks. I created this site to put what I know in one place.
If you’re an automotive enthusiast trying to make a smart decision about your transmission and its cooling needs, this is the resource I wish had existed when I was starting out.